Pages

Showing posts with label kids crafts. Show all posts

Wednesday, June 19, 2013

Summer Time: Silly Putty


Here's some gooey fun for the summer. My son loves to do science experiments and here is one that is sure to please any little guy. It's sticky and messy just what every boy enjoys. 

We used school glue and liquid starch. We got the starch at Wal-Mart in the laundry aisle. 

We started by adding equal parts but ended up having to use more glue and starch to get to the right consistency. 

We started by adding glue into a bowl with a little food coloring. Mr. I loves the color red so we had to use it. 

Then I added the liquid starch and just started mixing and kneading it into my hands until it turned into something like silly putty. 

We had fun making it and playing with it as we mixed it up. It also worked on newspaper however ours was a little sticky. 


Thursday, June 7, 2012

Summer Activities: I Spy Book


My son Mr. I loves I Spy books and I couldn't wait to come up with some way to keep him entertained with a cool book. I was so excited to come up with a way to make our own. 

I hope you have fun making one for your child. 

Supplies:

Card Stock 8x11

Magazines

Glue

Laminating sheets

Scissors

Hole punch

Ball keychain

Computer and printer (optional)

Directions:

Take the cardstock and measure out four squares. You will need 7 squares. 

Take one square and make a cover. Come up with a title and use your computer to print it out or use your own handwriting. I used letter stickers and stars. 

Next think of a theme you would like each page to be. Cut out objects from magazines to complete a theme. You will need 6 themes.

Now organize all your clippings into categories.

Take a square and start organizing the pictures in a collage pattern. Once you get an idea of how you want it you can start gluing.

Glue all the pictures on your cardstock. 


Once you get all your squares covered it’s time to make a list of things you want to spy. Depending on the age of your child you may only want to do 3 to 5 things. 

Type the list on the computer like this:

I Spy

A Butterfly
Three Paw Prints
Five Animals with Fur
Five Insects and
Four things that Fly

Print out the lists. (Check your list 2-3 times before you print it out.)

Cut out the lists and glue them to the backside of the picture. 


Next laminate the pages so that the book can last a long time.

Punch holes in the top corner and put the keychain through them to keep it together. 


You now have a cool “I Spy" book. Take it along in the car for long drives and bring along a dry erase marker to circle the objects when you find them. 


Tuesday, June 5, 2012

Summer Activities: Place Mats

Place Mats are a good thing to have if you have a messy child or if you are just trying to keep your kids entertained at the table, restaurant or their grandparents house.

Mr. I really likes to make food groups so for our place mat I drew the food plate from the http://www.choosemyplate.gov/ and then we cut out food from magazines. You could do any theme you like or you could just draw a picture. It's really up to your child what they like the best. 

Supplies:

Paper

Glue

Scissors

Markers, Crayons or Paints

Contact Paper 

Directions:

Take the paper and make a design using writing utensils or gluing magazine clippings. 

When you are finished measure out some contact paper and cut. 

Remove the backing of the contact paper and put it on top of art work. Repeat on the back side. 

Cut off access contact paper. 

Display your play mat on your table or keep for visits. 

Here's another idea. Use draw erase markers to draw on them and wipe them off.


Sunday, June 3, 2012

Summer Activities: Sidewalk Chalk Paint


Supplies:

Chalk pieces
Water
Cups
Rolling Pin or hammer
Teaspoon
Paintbrushes
Plastic storage baggies

Directions:

Gather all the chalk pieces and put into a zip-loc bag. Separated by color.

Next use a rolling pin to finely crush the chalk up. (Make sure children use a hammer with supervision)

Put 1 teaspoon of chalk dust into a small cup and add 2 teaspoons of water. Add more or less water and chalk dust to make yours darker or lighter.    

Next let your child use a paintbrush to paint with the new water colored chalks. 

You can also paint on paper or pine cones. 

 
Summer Activities Week 2:
Sunday: Sidewalk Chalk Paint
Monday: Story Time
Tuesday: Place mats
Wednesday: I Spy
Thursday: Websites for Kids
Friday: About Me Collage
Saturday: Celery Science Project 


Sunday, May 27, 2012

Summer Activities: Travel or Nature Journal

Here's the first installment of Summer Activities. I hope that you enjoy coming back everyday to find out what's new and follow me on Pinterest to see all the activities I have. 

This summer I plan on going to quite a few places around my city and nearby towns. We also have one big trip planned to Big Sky Montana too. It should be a lot of fun. I wanted to make sure my kids had something to write down their new discoveries and journal about their days. 


The little travel journals I made here are the done the same way just in a smaller size. I let the kids decorate them with letters and stickers.

 The Happy Gang with the Nature Journals


Here's this weeks line up.

Week 1:
Sunday: Travel/Nature Journals
Monday: Library Trip
Tuesday: Pet Store
Wednesday: Summer Reading
Thursday:  Binoculars
Friday: Root Beer Floats
Saturday: Pet Rocks

Thursday, May 24, 2012

Crafts: Sun Prints

 
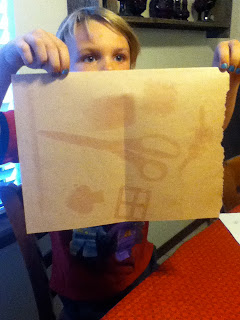
Last summer I had my nephews over at my house and had them make sun prints. They really had fun making them and while we waited we had Popsicles. 

It was a great summer activity.

Here's my post on MetroFamily Magazine to find out how to make your own prints. 

Note: If you use scissors please supervise the children.

Here's our day of fun. 


Popsicle Time


Our Finished Prints


Friday, May 11, 2012

Crafts: 7 Mother's Day Presents You Can Make


Happy Mother's Day!

Celebrate Mother's Day making your own special artwork. Here are several ways to say I love you.


Make pretty flowers using a stalk of celery. It's fun and turns out beautiful. I think any mother would love them.

Click here for instructions.


This is a valentine's coupon book but you can make it for mom too, just add Mother's Day Coupon Book to the front instead. Include some chores your mom would love you to do. I'm sure she will appreciate it.


Click here for instructions.


Recycle a coffee filter and make mom a whole bouquet of flowers. They would make a beautiful center piece. Grandma would love them too.

Click here for instructions.


Make a Butterfly Sun Catcher. This project will take some help from an adult but it is so wonderful and would make a really nice addition to any window. 

Click here for instructions.


A refrigerator isn't complete without a few homemade magnets. These are cute little magnets for any refrigerator. 

Click here for instructions. 


Moms love keeping journals. It's a perfect way for her to write down her thoughts and spend some quiet time.  

Click here for instructions.


Plant mom some pretty flowers she can add to her outside garden. Make sure you pick some flowers that can come back every year, that way mom can remember how much you love her each year they bloom.

Click here for instructions. 

Does your mom like to read. Here are several books that are super for any mom. Plus be sure to sign up for the giveaway while you're there.

Click here for the article and your chance to win. 

Friday, April 20, 2012

Ways to Recycle Household Items

Earth Day is Sunday. I decided it would be kind of cool to make a list of things you have around your house that you can recycle and offer some ideas on what you can do with them.  

Glass bottles – spaghetti sauce or pizza sauce jars are great for holding art supplies or making gifts. Embellish the tops and it makes it look fun and special.

Newspaper – make hats, modge podge and wrap presents.

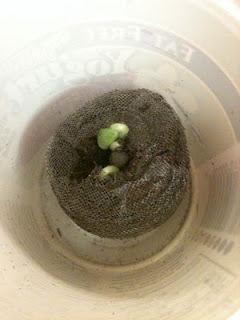
Yogurt containers – Planting Seeds with Kids, use for dipping sauces and painting. 

Toilet paper rolls – Little People, binoculars, musical instruments and planters.

Paper towel rolls – musical instruments, kaleidoscopes and rocket ship.

Baby food containers - good for storage of nails, push pins, stickers, beads and other little things.

Formula cans – pencil holders, cookie containers for gifts, banks, storage and drums.

Milk and Water jugs – candleholders for Halloween, bird houses and robots.

2 Liter Bottles – bowling pins and science experiments.

Cans – pencil holders, storage, candleholder and luminaries.

Cereal boxes – book holders and folders. 


 T-shirts – scarves, purses and bracelets.

Spray bottles – tie-dye art, water fun and painting.

Magazines – Silly faces, collages, art work, educational crafts for kids to discover animals, letters, numbers, shapes, body parts and food.


Chip cans – Bank for kids and good for spaghetti noodle storage.  


You can also recycle clothing, toys, books, video games and electronics. There are places online and around neighborhoods that make swapping and trading fun and easy. Plus you might be able to make a little money too.

Here are some websites I’ve used to make trades and get new things for my family. This is a great way to get new items for free or cheap.

Listia – Is an online auction site that allows you to put things up for auction and people use credits to bid on it. Sometimes you can get free shipping on items and other times there is a shipping fee. There is everything available electronics, books, video games, toys and tons of other things. It’s free and you get 500 credits when you first sign up. 

Swap – An online swapping place that you can find video games, books, movies, clothing, gift cards and other things. You list what you have available and than someone else offers you a trade or barters. Make trades online or meet up with people around your area. Free to sign up and check out. 

ThredUp – A great place for parents to get clothing their children. Request a bag and fill it up with your gently used clothes and receive credit to get a bag of clothing too. 

Freecycle and Craigslist are also good places to look for items that people no longer want. Sometimes they are free or just cost a small fee. The great thing about this site it’s all local to your area.   

Check your local neighborhood for Game Stop, Half-PricedBooks or Vintage Stock. These places offer new and used items and buy your used items.


Friday, April 13, 2012

10 FREE & Fun Rainy Day Activities


1. Play in the rain. If the rain is warm and it's safe put on some rain boots and grab an umbrella.  

2. Have a car race. Take some cars and have races around the kitchen floor or down the hallway. Winner gets to choose dinner, free day of chores or something special.

3. Camp indoors. Put up a small tent or make your own with blankets and chairs. Get sleeping bags or make a big pallet on the floor. Sing campfire songs and tell stories.

4. Make silly faces. Take magazines and cut out noses, mouths, ears and eyes. Glue them on a piece of paper and make a funny face.

5. Make play dough. Kids love cooking and they love play dough. Make a batch together. There are quite a few recipes out there. Some you can even eat.

6. Watch a movie together.  Make it a great family movie with popcorn and candy. Find a movie at Redbox for free using one of these codes. DVDONME or BREAKROOM.

7. Draw pictures of each other. Sit down and have each person sit still for a little while and draw each other. Don't draw very well. Use stick figures and magazines. 

8. Do a puzzle together. Find one that is going to be just the right challenge for your family.  Make your own puzzle by finding a picture in a magazine and gluing it onto a piece of card stock. Cut out pieces and put it together again.

9. Measure the rain. Take two cups that are the same. Put one in the front yard and one in the backyard. Which one will get more rain? Take guesses on which yard gets more rain and how many cups will fall.

10. Have a talent show. Each person in the family gets to stand up and show a talent they have. Can you put your leg over your head, make shapes with your tongue, play spoons or something else interesting. Show your talent.

Friday, April 6, 2012

25 Plastic Eggs Projects


1. Make your own play dough or silly putty and use the egg store it.

2. Read “Jack and the Beanstalk”. Use a gold or yellow egg and hide it for the child to find at the end of the story.


3. Use them for a dinosaur birthday party. Put dinosaurs inside them and hide them outside for the kids to go on a dinosaur hunt.


4. Use them for a magic trick. Take three halves and put a small object under one of them. Make a friend watch as you move the eggs around. Have them guess which egg the object is under.

5. Make aliens out of them with pipe cleaners, googly eyes and markers.


6. Make musical instruments. Add a tablespoon of rice, beans, oatmeal, salt or anything else that would make noise. Tape the egg shut and decorate it. Shake it to make music. Let little ones play with them with supervision.


7. Take the eggs apart and mix them up the eggs in a bucket. Have your preschooler match the bottoms and tops together and name the color of the eggs.

8. Paint with them. Cover the holes on one side and put a little paint inside. Tape it shut and shake it on a piece of paper to make a masterpiece.


9. Make silly faces. Take permanent marker and make eyes on one half and mouths on the other. Do this to several eggs and mix and match.

10. Decorate the eggs with glitter, stickers, markers and rhinestones.

11. Have egg races. Instead of using real eggs use the plastic eggs and balance them on a spoon and race with them.

12. Decoupage an egg with modge podge and stripes of colored paper or fabric.


13. Take 6 eggs and separate them, hide small matching objects under them. Mix them up and play a matching game.

14. Store fruit snacks or goldfish them and add them to your child’s lunch or for on the go.

15. Save the green eggs for Dr. Seuss’s birthday. Read “Green Eggs and Ham” and hide eggs with treats in places that are mentioned in the book.


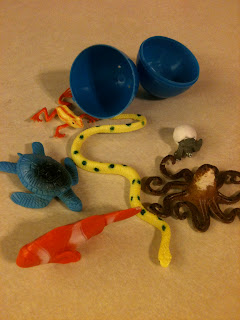
16. Print out pictures of animals that lay eggs and put them inside the eggs. Let your child discover the different animals and talk about them. Add plastic animals if you have them.

17. Make caterpillars. Use 9 eggs. Take the eggs apart. Use a pipe cleaner and thread it through one of the holes in the egg. Tie the pipe cleaner in a knot. Next add each piece of egg. When done adding pieces use the last egg and put the pipe cleaner through it and tie it off. Add the other part of the egg. Add another piece of pipe cleaner for antenna’s. Add eyes and mouths.


18. Make animal noses. Take one piece of the egg and measure one piece of yarn to fit around a child’s head. Thread the yarn through the holes at the end of the egg and tie them off. Use a piece of paper to make circles. Draw different animal noses on the circles. Tape or glue on the egg end.


19. Glue one egg halve onto a golf ball or big bouncing ball for a hat. Draw eyes and a mouth. Add felt feet.

20. Use permanent markers to make eggs into different balls. Orange egg for a basketball or football and white for soccer or baseball.

21. Opposites – Take a permanent marker and write one word on the top half of the egg and the other word on the bottom. Make several eggs and mix them up for the child to make the matches of opposite words.

22. Synonyms - Take a permanent marker and write one word on the top half of the egg and the other word on the bottom. Make several eggs and mix them up for the child to make the matches.

23. Alphabet - Take a permanent marker and write a capital letter on the top half of the egg and a lower case letter on the bottom. Make several eggs and mix them up for the child to make the matches.

24. Numbers - Take a permanent marker and write one number on the top half of the egg and make dots like a dice on the bottom. Make several eggs and mix them up for the child to make the matches.

25. Compound words - Take a permanent marker and write one word on the top half of the egg and one word on the bottom. Make several eggs and mix them up for the child to make the matches.

Friday, March 16, 2012

Craft: St. Patrick's Day Picture


Here's a fun and easy craft to celebrate St. Patrick's Day. This cute little rainbow and pot of gold is sure to make any little person happy.

Happy St. Patrick's Day. Don't forget to wear green, nobody wants to get pinched.

Click here for the craft at MetroFamily Magazine.

Friday, March 9, 2012

Craft: Save the Daylight


This weekend is Daylight Saving Time. I love and hate this time of the year. I love that the sunlight will be here longer but hate loosing my sleep.

Here's a great craft to help teach your children about time.

Here's the link to my latest post on MetroFamily Magazine.